Setting Up Payments
Step 5 of the Set up WooCommerce Using the Onboarding Wizard series.
Now, it's time to setup payments for your shop. This is one of the most important steps, so make sure you save some time to finish
it if needed. After completing this step, you're closer than ever to start accepting orders from your customers.
Note: If you exit the onboarding wizard before completing it (e.g. browser tab or window closed, clicking on the X button on the upper right corner of the pop-up window, etc), you can continue from where you've stopped by clicking on the Resume onboarding button on the top of your page whenever you're ready.
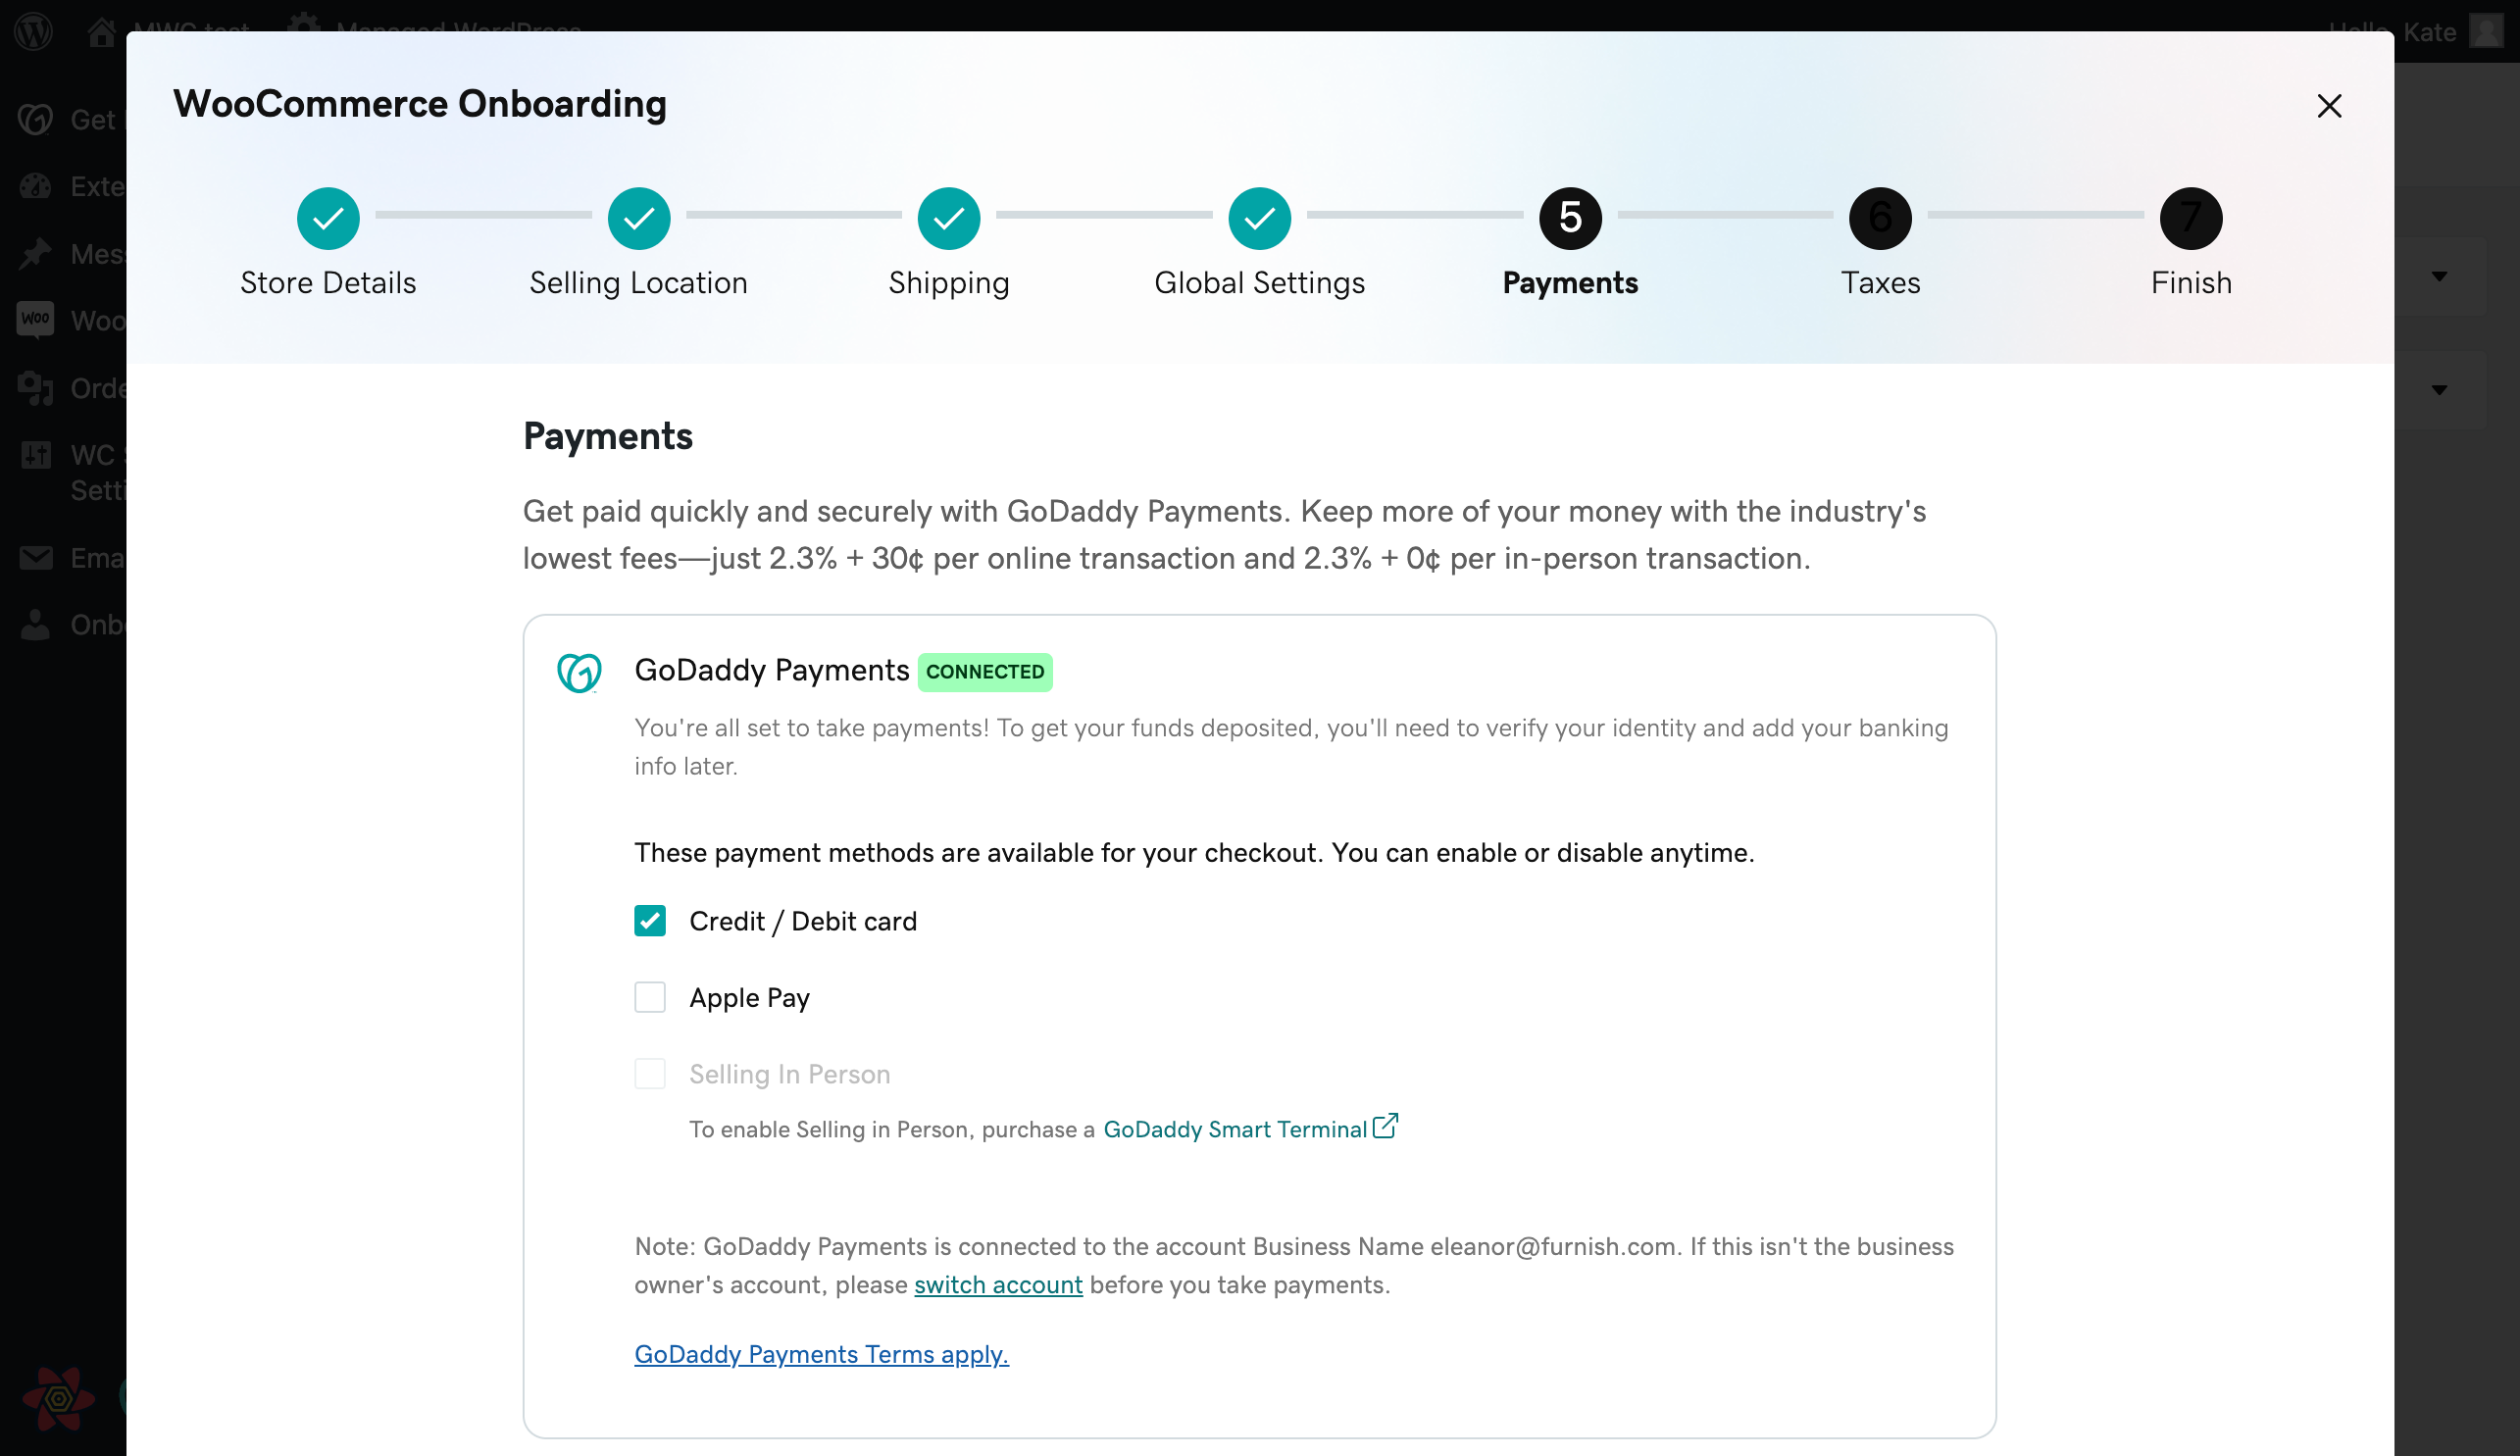
As a US-based merchant, you’ll see GoDaddy Payments gateway is already connected and pre-approved. You’ll be able to choose if you want to enable the Credit/Debit card, Apple Pay, Selling in Person or all of those payment methods on your website. However, kindly note that enabling any of those will mean that customers will have access to them and can place an order right away.
Note: If the website is not connected to the correct GoDaddy account (e.g. a developer configuring a site for a merchant), on this step you can connect it to the correct one by clicking on the switch account link. This will ensure that your GoDaddy Payments account is created for the correct account.
You can make changes to payments in the future by navigating at the WooCommerce > Settings > Payments page from your site's admin dashboard. When you're ready to proceed, either click on the Continue button or click Back for any changes you want to make to previous steps.
More info
- Check this series of how-to videos for GoDaddy Payments
- Find out more about the cash on delivery payment method
- Configure the CyberSource payment method for your WooCommerce shop
- Find more information on how to configure Stripe
